Calibration and adjustment of humidity instruments: pros and cons of different methods

There are many ways to approach the calibration and adjustment of relative humidity instruments. In a perfect world, all instruments would be checked and certified in accredited laboratories to the highest standards.
In the real world, however, we must balance time, cost, technical requirements, expertise and the unique needs of each specific user organisation. To help sort through different calibration approaches and methods, some of the most common will be described in this article, along with their advantages and disadvantages.
First, there are four concepts common to all calibration work that should be clarified:
- Calibration: The act of comparing an instrument's measurement to a known standard.
- Adjustment: The act of adjusting an instrument to match a standard.
- Calibration interval: The time elapsed between successive calibrations of an instrument.
- Working standard: An instrument calibrated against either a secondary or primary standard and used to calibrate other instruments.
The word 'calibration' is commonly, but not universally, interpreted to mean comparison and adjustment. To avoid misunderstanding, never assume that calibration includes an adjustment to an instrument.
Users often ask manufacturers for a recommended calibration interval. This is a reasonable starting point but, in practice, instrument performance may degrade at different rates depending on the use of the instrument, so the user must establish an appropriate calibration interval.
The metrologist's approach to this problem is to develop a history for the instrument by calibrating it (without adjustment) regularly until the measured drift exceeds allowable performance. The time between the 'in service' date and the last acceptable calibration becomes the calibration interval. This interval is monitored with less frequent calibrations until an acceptable pattern of performance is demonstrated.
A working standard can be any instrument that is used to calibrate other instruments. It is not necessary that the working standard is the most accurate or repeatable of all possible instruments. The measurement performance of the working standard needs to be adequate for the intended use only. It is important that the working standard is regularly calibrated against a secondary or primary standard and its performance is carefully monitored and documented.
The importance of temperature on relative humidity measurement
Relative humidity measurement is extremely temperature dependent. For the best possible calibration results, all apparatus used for calibration should be in temperature equilibrium. This means the calibration environment should be at a stable temperature and the working standard and unit under test must be at the same temperature.
If these conditions are not achieved, the calibration will have error caused by temperature gradient. In practice, this means that portable working standards must be given time to equilibrate when used in the field. This is particularly important when a standard that has been stored at room temperature is used in a process or environment that is warmer or cooler than room temperature.
One-point in-situ calibration
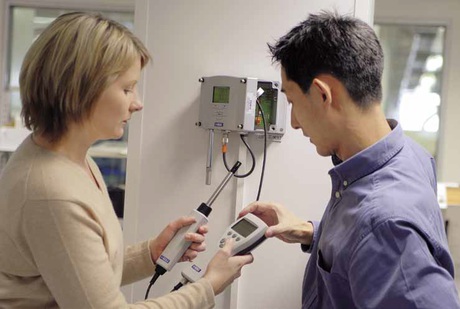
The one-point in-situ calibration method uses a working standard to calibrate a permanently installed field instrument without removing it from service. For instance, a technician may enter a room and use a handheld device to check a wall-mount transmitter.
The main advantage of this method is its speed and ease of execution. There is no downtime for the field instrument and no additional labour required for dismounting and re-installation. A disadvantage to this approach is the lack of a second calibration point to indicate the correct dynamic response of the field instrument. If the measured conditions are stable within a small window, it may be adequate to gently breathe on the sensor and observe response and recovery. If the measured conditions vary over a wide range, a multipoint calibration is recommended.
Multipoint field calibration
Two-point or three-point calibrations can be accomplished in the field with the help of humidity-generating equipment, as long as the local environment is at a stable temperature. Known humidity levels can be created with a variety of devices, each with its own specific limitations and requirements. For example, a saturated salt bath is economical and easy to transport. However, sufficient time must be allowed for humidity equilibration after the bath is opened to atmosphere. Salt baths are not considered traceable. Traceability can only be obtained by using an appropriate working standard in the bath with the unit under test.
The advantage of a multipoint field calibration is the ability to determine whether the field instrument operates correctly over the range of interest. Unfortunately, these calibrations are more difficult to perform than a simple, one-point in-situ calibration. The technician needs more equipment, the field instrument usually has to be taken offline and the procedure can take an hour or more to complete. Field conditions are rarely optimum, so the highest level of accuracy is difficult to achieve.

In-house laboratory calibration
A number of organisations have dedicated in-house metrology and calibration capabilities. These are often found in organisations with many instruments to maintain and/or a need for 'mission critical' measurements.
In-house laboratory calibration offers many advantages. The capabilities of the lab can be matched to the needs of the organisation. In some cases, instrument users are completely relieved of responsibility for instrument performance. Metrologists can determine calibration intervals and trained technicians perform work at the highest level in a controlled environment. Rapid turnaround time is possible and customised 'field service' can be made available to satisfy special requirements. Some convenience may be lost in large organisations where the calibration facilities are not located near the field instruments.
Commercial calibration laboratory
Commercial calibration laboratories offer calibration services. Instruments are typically removed from service and sent to the laboratory for calibration. Some commercial labs will provide personnel to remove and install instruments, and some even offer on-site calibration in a portable laboratory.
Commercial labs are particularly useful for users with such a small number of instruments needing calibration that an investment in calibration equipment is not justified. These labs have varying levels of capability but some can provide very high performance calibration, second only to national standards laboratories such as NIST. Commercial labs may specialise in humidity conditions that are difficult to achieve; for instance, extreme high or low humidities at extreme temperature ranges.
Users in search of a commercial lab should consider seeking a lab that is accredited. Accreditation means that the lab has been inspected and certified by an independent organisation. The accreditation process results in an approved 'scope' for the laboratory. The scope defines the parameters, ranges and uncertainties that the laboratory provides. Accreditation bodies maintain listings of the certified laboratories and their capabilities.
Field-replaceable sensor modules and probes
Some instrument manufacturers have designed replaceable humidity sensor modules or complete measurement probes, calibrated and tested to meet design specifications. The replaceable modules and probes are often supplied with calibration certificates as they are intended for applications where traceability is important.
The replacement process is fast and convenient with minimal downtime — recalibration is not required. The downside to this approach is that the calibration needs to be planned well ahead and new modules or probes need to be ordered before the intended calibration date. Depending on the design, some sensor modules and probes can be adjusted using a portable reference meter, or returned to the manufacturer for adjustment or repair
Could this optical centrifuge demystify exotic, frictionless superfluids?
A new optical centrifuge has enabled the first demonstration of controlled spinning inside a...
From assistance to agency in biopharma R&D: benefits of next-gen AI-native lab notebooks
The next generation of AI-native lab notebooks has the potential to turn AI into an active...
Images reveal "incredible" detail of industrial micro-CT scanner
Images of intricate biological structures and everyday items have revealed the capabilities of a...


